Showing posts with label copper. Show all posts

Friday, April 22, 2011

Been on a Brief Hiatus

Or is it “long time, no blog”?

I have been caught up in a lot of other things lately, and sadly I have neglected my blog!

To make up for it, let me share one of my “in progress” pieces… another 3 wire woven cuff much like the 3 Wire, Unleashed I created last year. Same base, but I've gone in a wildly different direction with it! One thing I have kept very similar to the last cuff was the treatment on the clasp. That will be the same.

Like the twisty crazy wire? I’ve been obsessed with the sculptural wire jewelry for a few years, and I am determined to learn how to do it! Unfortunately, other than Remy Heath’s wonderful Woven Sculpture Pendant tutorial, and a few other very basic “rainbow weave” tutorials, there is very little in the way of documentation on how to do this. So, I am muddling through on my own just like everybody else that wants to learn this technique! It is a lot of fun, like a deranged jigsaw puzzle.

This piece has been in progress for about a year now. I pick it up, work on it until I get lost, then put it down again for a period of time. I haven’t decided whether I am near a stopping point or not. But it has been a lot of fun to let the mystery unfold!

Saturday, January 22, 2011

A new, improved "unabashed" 33 pendant!

To quote one of my least favorite pop tarts... …“oops, I did it again!”

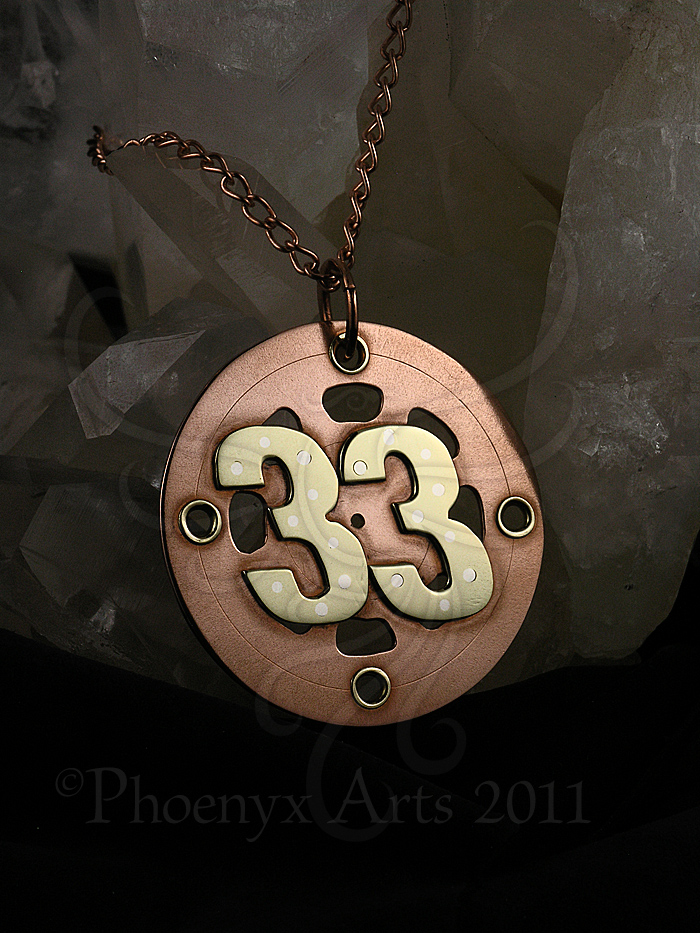
Another “unabashed” #33 Clint Bowyer pendant. Copper, brass and sterling rivets. All cold connection. Made the numbers a little neater, different texture and treatment to the copper. I left it all unantiqued to let it develop a patina on its own. Of course the wearer could keep it looking as fresh as a newly minted penny by giving it a periodic cleansing in ketchup to keep the tarnish off. :)


 Slightly different treatment on the copper. The numbers were derived from an actual typeface rather than a rough sketch like my original “unabashed” pendant. Still it conveys the spirit of the piece, and the wearer would get a lot of attention from it.

This is the backside view of the piece showing how the rivets look. They shine up kinda pretty, like a constellation. Its the Clint Bowyer constellation, baby! Oh yeah! Rising star!!

Year Of Jewelry Challenge: Week 3

This is a Dual Purpose piece. First of all, its a lovely hammered copper pendant, with woven embellishments, and hematite beads.
But wait, there’s more!


It is also an…


EYEGLASS HOLDER PENDANT!!


While this is not an original idea, the design and execution are my own. This stands well on its own as a pendant, but makes a great place to hang your eyeglasses or even sunglasses without having to use the ones that suspend from your ear pieces. While those are great, I personally find them cumbersome.

I like to use one for my sunglasses when I am out at car shows or outdoor events, and I am photographing cars, people, etc. Great place to keep my shades safe since I'm usually wearing a cowboy hat & can’t perch them on my head.

I have a number of these I just completed, and they will be up for sale on my ArtFire page very soon. Phoenyx Arts Artfire Page

Year Of Jewelry Challenge: Week 2

Ok, a little late on posting the Week 2 entry, but that's only because I didn't get it done until well after the Week 2 deadline. The suggested theme for Week 2 was “lunar eclipse” but I will call this one “oh for Peace sakes, my need to get other deadlines finishes completely eclipsed my ability in meeting the week 2 YOJ dealine on time”.  I am working on a baseball related book as a contract job, and its “eclipsing” just about everything else right now.

However, enough whining about that. Here is the peace, er, piece:

I got the idea for the execution of this from Tangocat Gems’ “Filigree Cross” tutorial. Thought it would be fun to do a peace symbol using the same twisting & twining that she illustrated in that tutorial. Copper wire.

Sunday, January 9, 2011

Year Of Jewelry Challenge: Week 1

About a year or so ago I started running across blog postings by various jewelry artists I really respect, and noticed they would post "Year of Jewelry" entries. Last month I was lucky enough to find out from Nancy Wickman of Wickwire Jewelry that there was another one starting up for 2011!

The Year of Jewelry Challenge is to create and post a new piece of jewelry every week. My personal challenge is to stick with this and to learn a lot more about the creation of jewelry and its various techniques.

The theme for Week 1 is “New Beginnings”, and decided what I've been playing with in the lessons from Jodi Bombardier's new book "Weave, Wrap, Coil" would be appropriate. The ring is the first woven wire ring I have ever made (and the jury is still out to whether I enjoyed it or not) and the other piece is part of one of the necklace projects. While I'm pleased with the weaving on this piece (and it was a challenge to weave to a narrower point!) the symmetry is off on the frame. So, this will likely become the dangle on a forged copper bookmark or something.

Couple New-ish pieces

Another fun use for the Skull design I created some time back… earrings!
This time I cut the skulls out of copper, and riveted them to brass using sterling wire. Details were added to the skulls using the Dremel engraver. I polished the entire thing to a high shine, then decided to dip them into liver of sulfur to give them that antiqued look.

My friend and occasional coworker commissioned me to make this necklace for his mom for Christmas. Since she is a big fan of the Grateful Dead we decided a Peace symbol would be appropriate. After some trial and error, then going off in a direction that I needed to steer my way back out of, this is the result:

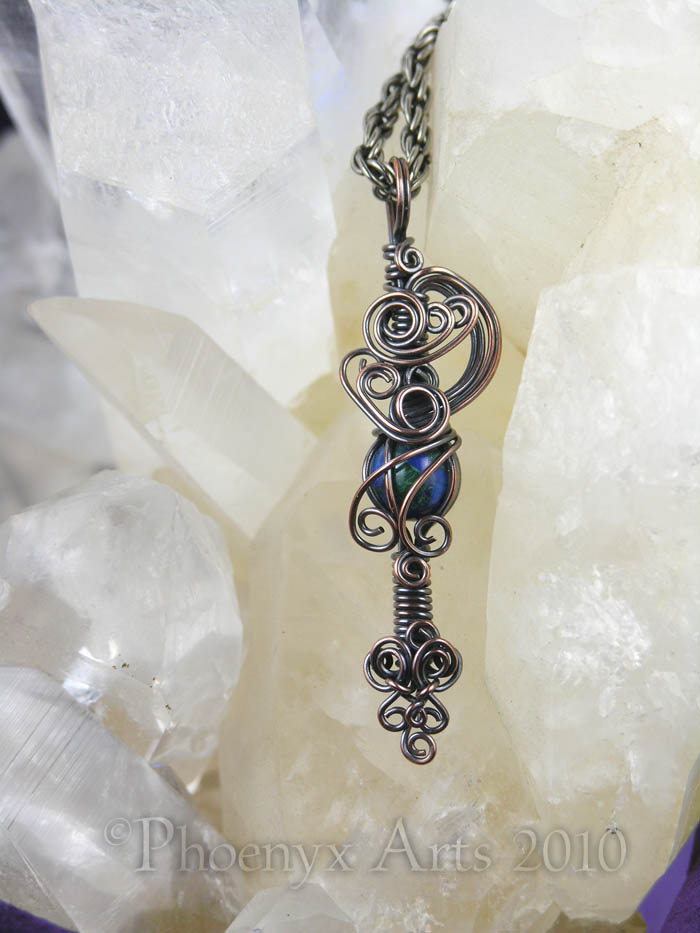
 Woven peace symbol on a hammered frame. Copper wire, with amethyst, laboradorite, carnelian, sunstone & moonstone. All the stones tie in astrologically with the members of the family. Ended up making the chain too, because pairing this piece with a commercially made chain looked, well, wrong. Wasn't originally part of what I was going to make, but it was a matter of pride, and since both my friend and his mom are both really good people, worth the extra effort.

Multiple shots, because I'm experimenting with different ways of photographing my jewelry to see what showcases it the best for the pieces that will be posted on ArtFire soon.

Makes me glad I've held on to these crystals over the years. 

Plain white background is ok, but I'm still at a loss on photographing a piece without any "props". Ah well, its all a learning process.

Wednesday, August 18, 2010

Jewelry Photo Blitz

Most of the time I end up putting off photographing the pieces of jewelry I am working on until I have a larger quantity to photograph, then shoot them all in one big blitz. Here is the latest batch of pieces I was working on following a number of tutorials I had purchased to learn new techniques:

First we have a couple pendants made using the techniques in Donna Spadafore’s “Caged Bird’s Song” tutorial.


I really learn a lot about wire weaving from Donna’s tutorials. Here is a piece using her “Woven Wire Cage” tutorial.


And one from the “Odyssey” tute.


Abby Hook’s “Love Pendants” tutorial provided the technique for this Celtic knot pendant. I had attempted the other one in the tutorial, but it ended up residing in my “fail bucket”. It happens.


Had a lot of fun creating this bracelet using Donna Esposito’s “Etruscan Scale Bracelet” tutorial. The blue quartz beads really glow against the copper. Great dye job on those beads!


A large stone bead wrapped playing with the techniques in Danagonia’s “Nugget Bead Framing” tutorial.


Nancy Wickman, aka “Wickwire” share a lovely tutorial for a Woven Pendant on her blog. This is my result.


Last, but by no means least, a pair of earrings I designed and created to complement a bracelet I posted a while back.


The Fall Semester just started up this week, and I am taking the jewelry fabrication class again. I am very excited about what I will be learning in this class. I plan on doing a lot more bezel setting, some enameling, and hoping to start doing more metal shaping too.

In other news, I just started doing some part time production work for another jewelry artist. I am very excited about this because I get to work with a jewelry designer whose work I have been a fan of for a while, and gives me an opportunity to learn more about production work on multiple pieces.

Friday, June 25, 2010

33 pendant: “Unabashed”

Valli Hilaire of The Fast and the Fabulous referred to me as an “unabashed Clint Bowyer fan” in her blog entry “To Infineon and Beyond”. Had the opportunity to meet that wonderful woman at Infineon Raceway on June 18.

And its true! I have other drivers I like, but Clint is my favorite.

Only drawback is, there is an absolute lack of really cool #33 jewelry out there. I kept threatening on the forum that I would make my own. I finally made good on that threat:


Copper & brass with sterling rivets. This was the experimental piece, and I have other ideas in mind for the future…whatever number(s) I end up putting on it (them).

Notice all the scratches in the numbers? I kinda lost my temper at this piece at one point, took my file to the brass in a not so loving way. Was having a little issue with the rivets. Almost chucked this piece in frustration. My jewelry instructor basically told me to get over myself and keep at it. I'm glad he did. Future versions won't bear the scars like this one… unless of course somebody orders one that way.

And a slightly less “dramatic” looking shot of this:


Hmmm, too bad its 3 in the morning… I want to go make another one RIGHT NOW!

Thursday, May 13, 2010

3 Wire Cuff Unleashed

Jackie of Feeling Stone Gifts created this wonderful tutorial. She gave the basics of the technique, and then basically tells you to ‘have at it’ with the embellishment.
 
A great way to use a lot of ‘stray’ beads I have had around for a while.


My embellishments ended up manifesting themselves on the ends of the cuff. I added extra wire loops, which provided more foundation for the freeform part. Perfect place for one of these heart beads!


If you can't tell I love red, look again! Ok, purple is my favorite color, but red is a close 2nd! Every bead is some shade of red, even the ones that look black.


Even though it didn't call for one in the tutorial, I added a clasp. Even though I put it on to see how it would be without a clasp, I know it would be just one epic flail (haha! Thanks, Lyz!) away from flying off.


All I can say if you make jewelry, newbie or veteran, this is a fun exercise in creativity.

Thanks for looking!

Saturday, May 1, 2010

The Wrapshody Continues…

A friend and fellow Clint Bowyer fan liked the coiled bangles so much she asked me to make her one in silver. She has wrists that are a bit larger than mine, so I made a “rough draft” in copper first…


Then made the silver one. Never ceases to amaze me that copper and sterling, while similar in softness, behave so differently. I’m pretty happy with the way it turned out. (Thanks again, Stacy of Hodgepodgerie for providing such an excellent tutorial on this technique!)


Decided to play with this a bit more and create one with some chunky carnelian beads I found a few years ago. Problem with stone beads is often they do not have straight holes drilled in them. On the entire strand I was lucky to find three that had holes large enough for 12 ga. wire. One still needed a little “persuading” with a bead reamer. Seriously considering an electric one.


I was so thrilled by this one, I had to design and create a matching pair of earrings. Necklace in the works, so stay tuned!

Sunday, March 14, 2010

Twisted, Coiled, Wrapped & Linked

This necklace went through a couple revisions, and several months on the back burner before I finally completed it.

A look back to “A Trio of Coiled and Beaded Earrings”  shows some coiled components using seed beads and wire. These were originally created as links for this necklace, but they did not work. At all.

A lot of influence for this piece came from things I learned in the classes given by Lisa Niven Kelly many years ago, and Sharilyn Miller’s book “Bead on a Wire”.


Sunday, March 7, 2010

Hammered Hearts Take 2

After seeing a copper cuff somebody created out of thick gauge wire, it reminded me of some of the methods I played with in blacksmithing. I incorporated those into the design of the original Hammered Hearts. Gives the points at the bottom and separating the globes at the top a little more definition.


Gave the points on the 2nd one a little bit of a curl to see how it would look.

Whether they are better than the original versions or not is up to the individual. I have things I like about both.

Friday, March 5, 2010

Bohemian "Wrap"sody

Last month I posted this copper coiled wire bangle and I've had a little more fun with it.
I decided that this was a little too plain for my liking, so I added jump rings to the end of the hook/clasp attaching it to the bangle, and a counterweight dangle. The bead on the dangle is one that I made a few years ago when I took a weekend class on lampworking. Tossed it in the tumbler for a bit longer, and this is how it looks now:
 
Decided to start exploring variations on the theme:


The beads are vintage, no idea of the era. Found them at this funky antique store many years ago. The bead in the center was on a necklace, the yellow beads at the bottom are a vintage strand that was strung on rawhide. I love how rough and organic they look, even the tiny bubbles in the glass. Named it "Bohemian 'Wrap'sody" as a tribute to the Bohemian movement, and that wonderful song by Queen.

More in progress, one in sterling, another in copper with carnelian. Stay tuned!

Wednesday, March 3, 2010

1st Class Project: Copper Pin

The first project my jewelry instructor gave the class was to create a pin/name tag using methods of cutting, hammering, texturing a piece of copper sheet.

Those of you that know my pinstriping style won't be surprised to find a wing in this design.


Before I cut it out,  I put the copper through the rolling mill with a feather on top of it. After cutting it out, did some more texturing using a chasing hammer, stamps, etc. A lot of fun and a lot of potential for future projects.

Tuesday, March 2, 2010

A trio of coiled & beaded earrings

These started out as components for a necklace I was working on, but they did not work out in that piece.


The top pair of earrings has copper earring  clasps purchased from my local favorite bead store Just Bead It and the bottom two pair are sporting ear hooks I created.

Working on ways to incorporate seed beads into my work since going back to seed bead weaving is something low on the priority of things to do. Very, very low.

Sunday, February 28, 2010

Wrapped Cabochon: Prong Style

As a child I was lucky enough to take lapidary classes for the space of about a year. Every Friday evening, my dad would drop me off at the rock shop for a few hours and I'd spend that time learning how to cut, shape and polish cabochons. I kept a few of the stones, gave away a few, lost a few.

This is one of the keepers. Many years later, it finally finds a “home” in a copper wire wrap.


I wish I could remember what type of stone it is. I'd like to say a type of jasper, but not sure.

Used the technique outlined in Remy Heath’s Border Wrap Prong Pendant tutorial. If you are looking to learn this method, it is well worth the investment.

Tree of Life in a Heart

A couple new pieces experimenting with the Tree of Life in a copper heart shaped frame.
First we have one with carnelian chips and goldstone beads with a copper chain.


Next up is one created with garnet chips and beads.


More pieces coming soon, as I just photographed a backlog of pieces. Stay tuned!